
A magnetic STEM block set with sharp, multi-color printed details that survive rough play and magnets that align perfectly every time requires two distinct manufacturing competencies under one roof: high-precision pad printing for decoration and tightly controlled assembly for magnet security. This article walks through both processes as they run on a Chinese OEM production floor — from CAD review and mold fabrication to pad-printing registration and ultrasonic magnet bonding — so you can spec your project accurately, understand where cost and lead time concentrate, and avoid the quality failures that trigger recalls.
Key Takeaways
- Pad printing is the go-to process for applying multi-color, high-precision artwork onto curved or irregular toy surfaces like block faces and doll features, with achievable registration accuracy that keeps eyes and logos sharp even at high cycle speeds.
- Magnetic STEM block assembly requires a dedicated production line that controls magnet polarity, insertion depth, and ultrasonic or solvent bonding to prevent loose magnets — a serious safety and quality risk.
- Custom OEM tooling for a new magnetic block set typically involves injection mold development for the ABS housings plus pad-printing cliché plates; MOQ for a fully custom branded run usually starts in the 1,000–3,000-unit range depending on part complexity and decoration colors.
- A realistic lead time from approved design freeze to FOB shipment for a new magnetic block project is 35–50 days, factoring in mold fabrication, first-article sampling, decoration proofing, and final assembly QC.
- International safety standards — ASTM F963, EN71, EN62115 for magnetic toys — should be baked into the design phase, not treated as a post-production checkbox; magnet security testing and small-parts warnings are non-negotiable.
How Is a Pad-Printed Magnetic STEM Block Made Step by Step?
A pad-printed magnetic block moves through nine sequential stages on a typical Chenghai OEM line. Skipping or rushing any stage multiplies the defect rate downstream.
Design & engineering review. You send reference artwork, 3D files (STEP or IGES preferred), and a bill of materials. The factory's engineering team checks wall thicknesses, draft angles, undercuts, and — critically for magnetic blocks — magnet pocket geometry and polarity orientation. If the design has internal ribs that will trap the magnet and a bonding surface for ultrasonic welding, that gets locked in now. For pad printing, they map how many colors the decoration needs and whether any artwork sits across parting lines or deep recesses that require a custom-shaped silicone pad.
Prototype & first-article sample. Before cutting steel, most factories produce 3D-printed or CNC-machined samples so you can feel the block fit, test the magnet pull force, and see a rough color placement. These aren't production-grade but they catch roughly 80% of design errors. Pad printing at this stage is often simulated with UV inkjet or decals — real pad-print proofing waits until the injection-molded parts exist.
Injection mold fabrication. For a six-piece magnetic block set with 4–6 unique parts, expect 4–6 injection molds, each a single-cavity or family mold depending on volume. Standard mold steel (P20 or 718H) is typical for ABS; higher volumes justify hardened steel. Mold build time: 20–30 days for a simple block mold, longer for parts with slides or collapsible cores. The magnet pocket is machined to a tight tolerance so the magnet sits flush and can't wiggle loose after bonding.
Pad-printing cliché plate preparation. Each color in your artwork needs its own etched steel cliché plate. A multi-color face — say, a character's eyes, mouth, and blush — might need 3–4 plates. The factory uses a laser engraver to etch the artwork into the plate at depth, then proofs each color on actual molded parts. Registration is adjusted so the layers align within ±0.1 mm. Once approved, those plates become part of your project's production tooling.
Injection molding. ABS granules are dried, fed into the injection molding machine, and shot into the mold cavity at controlled temperature and pressure. Cycle time for a small block part might be 15–25 seconds. Parts are de-gated, and a QC inspector checks for short shots, sink marks, flash, and dimensional accuracy right at the press. The magnet pocket gets a go/no-go gauge check.
Magnet insertion and bonding. Magnets must be inserted with correct polarity — if one block face repels when it should attract, the whole set is compromised. A jig or automated feeder orients each magnet before insertion. The magnet is then secured by ultrasonic welding (a plastic ring melts over the magnet) or solvent bonding. Some factories add a drop of cyanoacrylate as a secondary lock. Every block then passes a manual pull-test or goes through a magnet security tester. A loose magnet isn't a cosmetic defect; it's a recall hazard.
Pad printing decoration. The pad printer picks up ink from the etched cliché plate with a soft silicone pad and transfers it onto the block surface. The pad conforms to slight curves, which is why it outperforms screen printing on contoured toy faces. Multi-color jobs use a rotary indexing table or a linear shuttle — each station prints one color, and the part indexes to the next. UV or thermal curing sets the ink between stations. Cycle time per part: 3–8 seconds per color. A production-line QC inspector checks for smudging, misregistration, and ink adhesion with a tape test at regular intervals.
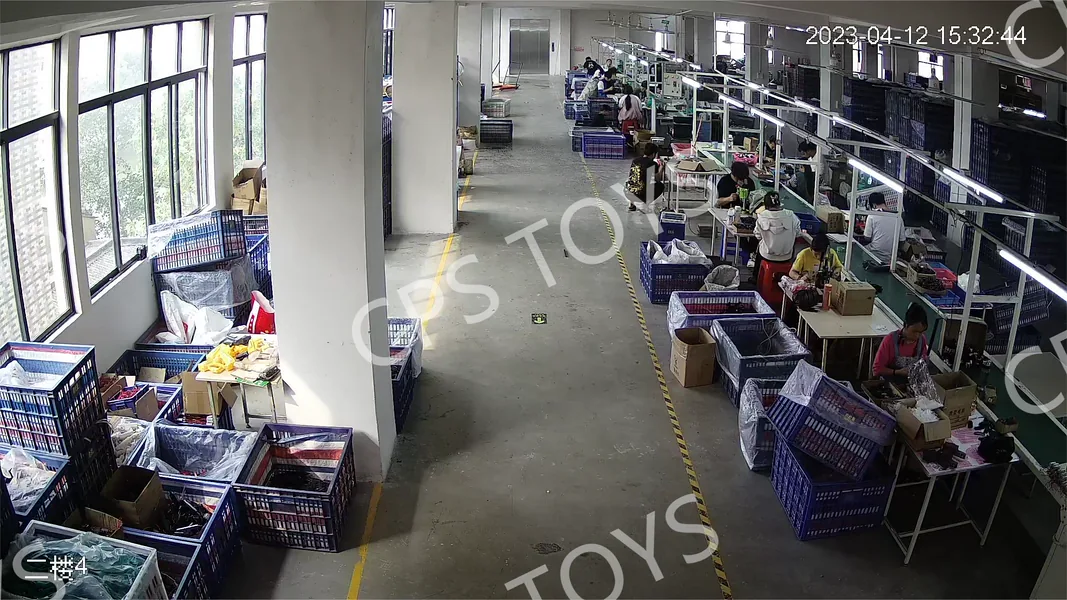
Assembly & accessory packing. If your set includes baseplates, wheels, or axle pieces, they get kitted together. Some factories run a semi-automated counting-and-bagging line; others do manual kitting with a checklist at each station. Magnets are double-checked for polarity with a simple jig — the operator touches each block to a reference magnet and verifies attraction.
Final QC and safety testing. A finished-goods sample is pulled per AQL 2.5 or tighter and run through a battery of tests: drop test, torque test on bonded magnets, tension test, small-parts cylinder, and — for magnetic toys — a magnetic flux index test required by EN71 and ASTM F963. The factory generates a batch test report that you can include in your technical file for CE or CPC documentation.
Packaging and shipping. Blocks are packed into your branded color box or blister card, often with an instruction sheet showing build ideas. The factory applies barcodes, warning labels, and country-of-origin marks per your spec. Cartons are palletized, and the shipment goes FOB Shantou or Shenzhen, typically 25–35 days after mold sign-off for a first production run.
What Tooling and Molds Do I Need for a Custom Magnetic Block Set?
Tooling is the largest upfront investment in an OEM magnetic block project and the longest lead-time driver. You're paying for two categories: injection molds for the plastic parts, and pad-printing cliché plates for the decoration.
Injection molds. A single-cavity mold for a simple block shape (no undercuts, no moving slides) typically takes 20–25 days to build. If your set has six unique block shapes, you're looking at six molds, though some shapes can share a family mold if volumes justify it. Mold cost varies by size and complexity — a small block mold costs less than a complex baseplate mold with multiple slides and a hot runner system. The steel grade matters: P20 (pre-hardened) is adequate for runs up to 300,000–500,000 shots; hardened H13 steel extends mold life significantly for millions of units.
Cliché plates for pad printing. Each color in your artwork requires a laser-etched steel plate. A four-color face design needs four plates. These are relatively inexpensive per plate, but they're specific to your artwork and can't be repurposed. Plate preparation takes 1–2 days per color once the artwork file is finalized.
Mold ownership. Standard OEM terms: you pay for the tooling, you own the molds. The contract should state this explicitly, and the molds should be marked with your company name or a unique ID. If you ever switch factories, you have the right to retrieve them — though in practice, portability depends on whether the molds fit the new factory's specific injection machines. Always confirm platen size compatibility before moving molds.
What Quality Control Checks Prevent Loose Magnets and Print Defects?
Quality control on a STEM block line is staged across every production step, not concentrated at the end, because a loose magnet is a safety recall trigger, not a cosmetic issue.
Incoming material inspection. ABS resin is checked for melt flow index and color consistency against a master batch standard. Magnets are tested for flux density and coating integrity (nickel-copper-nickel plating must be intact — a chipped magnet will corrode and shed sharp fragments). Pad-printing ink is verified for adhesion on the specific ABS grade and for compliance with EN71 Part 3 (heavy metals) and ASTM F963 soluble-element limits.
In-process QC during molding. Every 1–2 hours, the QC inspector pulls molded parts and checks critical dimensions with calipers, verifies the magnet pocket depth with a go/no-go gauge, and does a quick visual for flash, sink marks, and burn marks. If the mold is multi-cavity, they check all cavities. A parameter log tracks injection pressure, temperature, and cycle time so drift gets caught early.
Post-bonding magnet security check. After ultrasonic welding or solvent bonding, 100% of blocks pass a manual pull-test with a calibrated force gauge, or go through an automated tester that applies a set pull force and flags any block where the magnet moves. This is the single most important QC gate on the line. Some factories also run a random-sample tension test to destruction to verify the bond's ultimate strength.
Pad-printing QC. In-line inspectors check for registration accuracy (layers aligned within ±0.1 mm), ink opacity, and sharpness of fine details like eyes or text. A tape test — pressing 3M 600 tape onto the printed area and pulling it off sharply — is performed on samples every 30 minutes. Any ink lift signals a curing or ink-adhesion problem that must be corrected immediately.
Finished-goods audit. Per AQL 2.5 (normal inspection), the factory pulls cartons and tests for: drop test (1 meter onto concrete, no magnet dislodgement), torque test on any assembled components, small-parts cylinder (if any part fits entirely in the cylinder without compression, it fails), and magnetic flux index (must be below 50 kG²mm² for EN71, or below the ASTM threshold if marketed in the US). A detailed inspection report with photos and test data is standard for OEM orders.
Third-party inspection option. You can commission an independent lab (SGS, Bureau Veritas, Intertek) to perform an on-site inspection before shipment. A factory that resists third-party inspection should raise concerns.
Process at a Glance: Magnetic STEM Block OEM Timeline
| Design review & engineering | 3–5 days; factory checks CAD, magnet orientation, parting lines, and decoration feasibility |
|---|---|
| Prototype (3D-printed/CNC) | 5–7 days; functional fit-and-feel samples for buyer approval |
| Injection mold fabrication | 20–30 days per mold; multiple molds run in parallel if capacity allows |
| Pad-printing cliché plates | 1–2 days per color after artwork lock; QC point: registration proofing |
| First-article injection samples | 3–5 days after mold T1; QC point: dimensional check, magnet pocket gauge |
| Pad-printing proofing on molded parts | 2–3 days; QC point: tape adhesion test, color matching, registration accuracy |
| Mass production (molding + bonding + printing) | 10–15 days for a typical 3,000-unit OEM order; in-process QC at each station |
| Assembly, kitting, packaging | 3–5 days; QC point: polarity check, magnet pull-test, small-parts cylinder |
| Finished-goods audit & shipping | 2–3 days; AQL 2.5 inspection; FOB Shantou/Shenzhen |
Why Is Pad Printing the Standard for Decorating Curved Toy Surfaces?
Pad printing transfers ink from an etched steel plate (the cliché) to the part via a soft silicone pad that conforms to surface irregularities — making it the dominant method for applying crisp, multi-color artwork onto curved or recessed plastic toy surfaces where screen printing and hot stamping fail.
For magnetic blocks, block faces are rarely perfectly flat. They have raised edges, recessed centers, or slight draft angles from molding. A hard screen-printing squeegee would miss the recessed areas; the silicone pad reaches in. Multi-color designs use a carousel or linear indexer with a pad-printing head at each station; the part stays fixtured so registration stays tight. Drying between colors is either ambient flash-off or UV cure, with UV increasingly preferred because it eliminates solvent evaporation variability and lets the line run faster.
The quality variables to watch: ink formulation (must match the ABS substrate and pass EN71-3 heavy-metal limits), pad hardness (softer pads for rougher or more contoured surfaces, harder pads for fine detail), and cliché etch depth (deeper etch holds more ink for opaque coverage on dark substrates). A competent factory runs a tape test on every new ink batch and every shift change.
How Are Magnets Secured Inside STEM Blocks to Meet Safety Standards?
The magnet inside a STEM block must be fully encapsulated so a child cannot pry it out, even after repeated drops. According to ASTM F963 and EN71, swallowed magnets can cause intestinal perforation or blockage, which is why magnetic toy security and flux index requirements are strict.
The standard approach uses an injection-molded housing with a blind pocket for the magnet. The magnet is inserted with controlled polarity (a jig or automated feeder orients it), then a cap or ring is ultrasonically welded over the opening. Ultrasonic welding creates a molecular bond between the cap and the housing — it's not glue that can age or degrade. Some designs use an interference-fit press-in magnet backed by a secondary solvent bond, but ultrasonic welding provides the most durable encapsulation.
Polarity control is the other assembly challenge. Most magnetic block systems use a deliberate polarity pattern so blocks attract in any orientation. The factory must verify every magnet's orientation before insertion. A simple polarity-check jig at the insertion station — where the operator touches each magnet to a reference magnet and confirms attraction or repulsion per the spec — is the most common approach. For high-volume runs, automated polarity sorting feeders exist and reduce human error.
What Customization Options Do I Have for an OEM Magnetic Block Project?
An OEM magnetic block project gives you control over shape, material, decoration, packaging, and accessories — each with its own tooling and lead-time implications.
Shape and geometry. You can design entirely new block shapes — triangles, arches, connectors, baseplates with unique stud patterns. The mold is built to your CAD. The constraint is draft angle and wall-thickness uniformity: talk to the factory's tooling engineer early to avoid undercuts that need expensive slides.
Color and material. ABS is standard, but you can specify MABS (methyl methacrylate ABS) for higher transparency, or add a soft-touch TPE overmold for grip zones. Color is matched to your Pantone reference; the factory compounds masterbatch or uses pre-colored resin. A color-matching sample round adds about 3–5 days.
Decoration. Pad printing covers logos, character faces, numbers, and patterns. You provide vector artwork (AI or PDF). Each color is a separate plate. The factory proofs on actual molded parts so you can approve registration and color before production. Hot stamping and water-transfer printing are alternatives for specific effects, but pad printing handles fine detail best.
Packaging and private label. Your brand on the color box, your barcode, your instruction manual (the factory can do layout if you provide content). You can specify a display carton, a window box, a blister card, or a reusable storage tub. The factory sources packaging from its local supply chain, which keeps costs down and lead times short.
Accessories and add-ons. Baseplates, wheels, or a small instruction booklet with build ideas are separate SKUs that get kitted together. The factory's engineering team can design simple add-on parts to your concept sketch, or you can supply finished CAD.
What Are the MOQ, Sampling, and Lead Time Expectations for Custom Magnetic Blocks?
MOQ for fully custom OEM magnetic blocks is driven by injection molding setup costs. For a set with 4–6 unique molds, an MOQ of 1,000–3,000 sets is typical. Sub-1,000-set OEM runs are unusual because per-unit mold amortization rises sharply. If you need a lower initial quantity, consider starting with a stock mold (an existing block shape) and customizing only the pad-printing decoration and packaging — this can bring MOQ down to 500–1,000 sets.
Sampling. Pre-production samples (molded in the actual production mold, pad-printed with your artwork) are available after mold T1 and cliché proofing. Expect 3–5 sample sets. They're not free — you pay for the sample production run and courier shipping — but they're the most important approval gate before mass production. Do not skip this step.
Lead time from order confirmation to FOB. Budget 35–50 days for a new-tool OEM project. The critical path is usually mold fabrication (20–30 days), followed by first-article sampling (3–5 days), decoration proofing (2–3 days), and mass production (10–15 days). Repeat orders with existing molds run faster: 20–30 days.
How Do I Protect My IP and Brand When Manufacturing Magnetic Blocks in China?
Protecting your design files, molds, and brand is standard OEM practice, not a special request. A reputable factory will sign a mutual NDA before you send any CAD or artwork. The NDA should cover: confidentiality of design files and business information, non-use of your tooling for other clients, and non-disclosure of your branding and packaging designs. Molds are marked with your company identifier and stored separately.
For pad-printing cliché plates, after your production run the plates are either stored with your molds or destroyed at your instruction. They're small and inexpensive to remake, so destruction is often the simplest option. Your artwork files are archived and not reused. If you're particularly IP-sensitive, you can split the supply chain — have the molds made at one factory and the printing done at another — but this adds logistics complexity and coordination risk. Most brands keep everything under one roof for simplicity. Companies like TopToyFactory, operating in the Chenghai toy cluster, routinely handle NDA-governed OEM projects with segregated tooling storage as part of their standard workflow.
FAQ
What's the minimum order to customize magnetic STEM blocks with my own design?
For fully custom shapes requiring new injection molds, MOQ typically starts at 1,000–3,000 sets. Using existing block shapes and customizing only the pad-printed decoration and packaging can reduce MOQ to 500–1,000 sets.
How much do injection molds cost for a magnetic block set?
Mold cost varies by part size, complexity, and steel grade. A simple single-cavity block mold costs less than a complex baseplate mold with slides and a hot runner system. The factory provides a mold quotation after reviewing your 3D files.
Who owns the molds and cliché plates?
Under standard OEM terms, you pay for the tooling and you own it. Molds are marked with your identifier and stored for your exclusive use. Pad-printing cliché plates are project-specific and can be stored with your molds or destroyed after production.
Can you print our logo and multi-color artwork on curved block faces?
Pad printing is specifically designed for decorating curved and irregular surfaces. Multi-color designs use separate cliché plates and a rotary indexer for tight registration. Vector artwork (AI/PDF) is required for plate etching.
Will you sign an NDA before I share my design files?
A mutual NDA covering design confidentiality, non-use of tooling, and non-disclosure of branding is standard practice before any CAD or artwork is exchanged.
How do you ensure magnets won't come loose and become a swallowing hazard?
Magnets are inserted into a blind pocket with controlled polarity, then secured by ultrasonic welding — which creates a molecular bond between the cap and housing. Every block passes a pull-test after bonding, and finished-goods samples undergo drop and torque testing per ASTM F963 and EN71 standards.
Request a Custom OEM Quote for Your Magnetic STEM Block Project
Whether you have finished CAD and artwork or a rough concept sketch, TopToyFactory's engineering team can walk you through the tooling, decoration, and assembly requirements and provide a detailed quotation with timelines. Send your design brief, target MOQ, and any reference images to start the conversation.